Red Cup IT - Blog
  • 👋Welcome to Red Cup IT: Navigating the Modern Cybersecurity Landscape Together
  • ☄️Browser Security
    • Enhancing Security with the TalonWork Enterprise Browser and Okta for Sensitive Data Protection
      • How to Log into Office.com on Your Tesla and Check Azure Sign-In Logs for User Agent Version
    • Enhancing Web Security: The Case for Blocking JavaScript in the Omnibox
  • 👩‍💻IT & DevOps Security
    • Github
      • GitHub Cybersecurity Best Practices Checklist for Startups
      • Github Authentication with Passkeys
      • What is GitHub Domain Verification?
      • Essential GitHub Practices: Managing Member Privileges
    • Atlassian Jira
      • Understanding the New Atlassian Jira and Confluence External User Security Policy
    • Okta
      • Enhancing Authentication Security with Okta Identity Engine Factor Sequencing
  • 📨Domain Security
    • Importance of Secure SPF Records for Email Security
    • Strengthening Domain Registrar Security: Essential Strategies
    • Elevate Your Brand's Email Trust with BIMI and VMC: A Comprehensive Guide
    • The Critical Role of DNSSEC in Enhancing Business Domain Security
  • 🔐MSP Supply Chain Security
    • Leveraging Talon Browser's File Scanning Engine for Enhanced Security in MSP Environments
  • 🔎Real Time Threat Detection and Response
    • SentinelOne
      • SentinelOne and Okta Integration: Elevating Zero Trust Security in Okta
      • 🕵️‍♀️SentinelOne and Microsoft Entra ID Integration: Elevating Zero Trust Security in Azure AD
  • macOS Setup Guide for Software Engineers and Developers
    • Essential Tools and Software for macOS Developers
      • How to Install Homebrew on an Apple Silicon macOS Computer
      • Linking Visual Studio Code to GitHub on macOS: A Guide to Signed Commits
        • Choosing the Right GnuPG Key Type: A Guide to Secure Encryption
      • How to Enable Touch ID for sudo on macOS Sonoma (14.x) and Beyond
      • Enhance Your macOS Security with YubiKey as a PIV Card for Login and Terminal Access
Powered by GitBook
On this page

Was this helpful?

  1. IT & DevOps Security
  2. Github

What is GitHub Domain Verification?

PreviousGithub Authentication with PasskeysNextEssential GitHub Practices: Managing Member Privileges

Last updated 1 year ago

Was this helpful?

GitHub organization domain verification confirms your organization's identity by verifying ownership of domains. A "Verified" badge appears on the organization's profile once the domain is verified. This verification is done by adding a DNS TXT record through your domain hosting service and following GitHub's domain verification process.

GitHub Domain Verification is crucial as it confirms your organization's identity on GitHub, enhancing trust. It also helps in preventing data leaks by restricting email notifications to only the verified domains, thereby safeguarding sensitive information.

To set up domain verification on GitHub:

  1. Go to GitHub and click your profile photo, then "Your organizations".

  2. Beside the organization, click "Settings".

  3. Under "Security", click "Verified and approved domains".

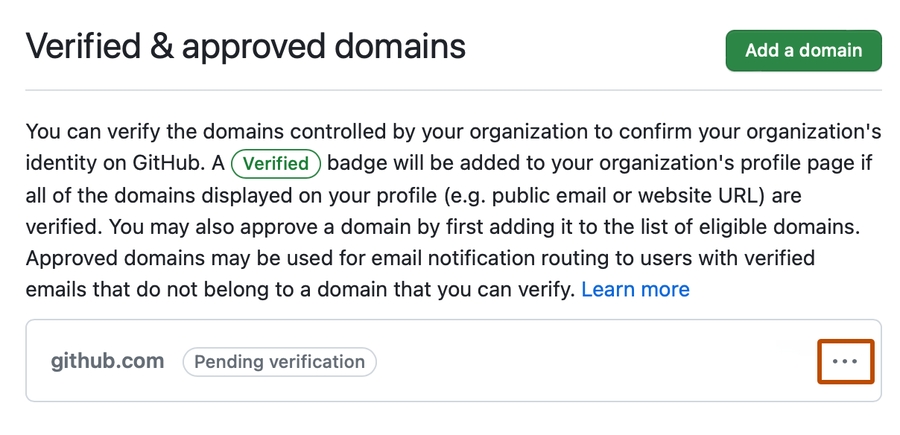
  4. Click "Add a domain" and type the domain to verify, then "Add domain".

  5. Follow the instructions to create a DNS TXT record with your domain hosting service. We recommend Cloudflare or AWS Route 53.

  6. Wait for the DNS configuration to change, which may take up to 72 hours.

  7. Confirm the DNS change, then navigate back to "Verified and approved domains".

  8. Beside the domain pending verification, click the dropdown menu, then "Continue verifying" and "Verify"【9†source】.

Source:

👩‍💻
https://docs.github.com/en/organizations/managing-organization-settings/verifying-or-approving-a-domain-for-your-organization
Screenshot of the "Verified & approved domains" page. To the right of a domain that is pending verification, a kebab icon is outlined in dark orange.